RE-COVERING A SEAT
If you love vintage bikes and have a survivor frame you’re ready restore, it can really tug at the heart strings to send those original decals and finish off to the painter, powder coater or electroplater, knowing they’ll be gone for good. It certainly helps to take lots of photos before hand, but even better still, a simple trace of your decals in conjunction with your photos will make it possible to give make a restorative reproduction and give them new life on your freshly refinished frame.
Most people are daunted by the idea of decal tracing, not knowing where to start. It’s really deceptively simple and you don’t need to be an artist or designer to do it, just a steady hand and a little patience.
You’ll need a tech pencil (the fine tip is important for accuracy) with ‘B’ grade graphite (HB can be harder to scan, 2B will smudge), scissors, removable tape and some tracing paper (available from any art supply store) or if you can’t get hold of any, you can use baking paper (not quite as good, but it’ll do the job).
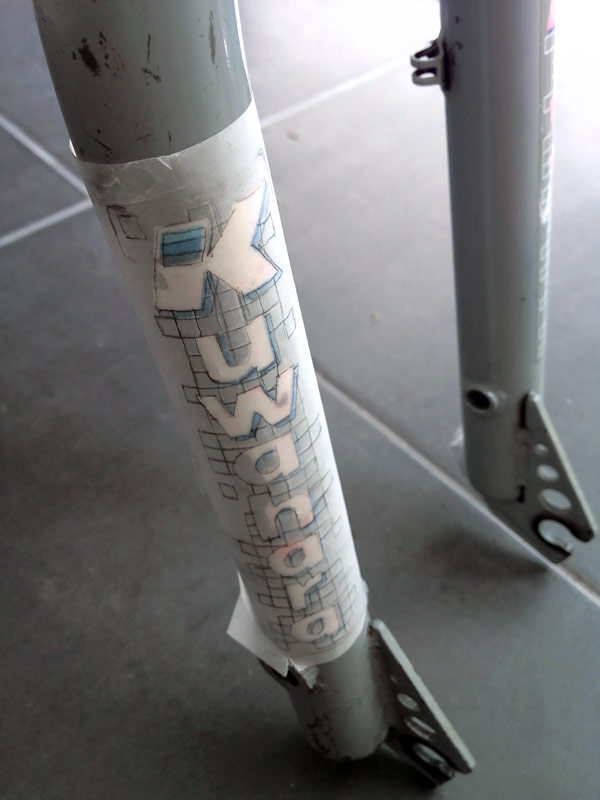
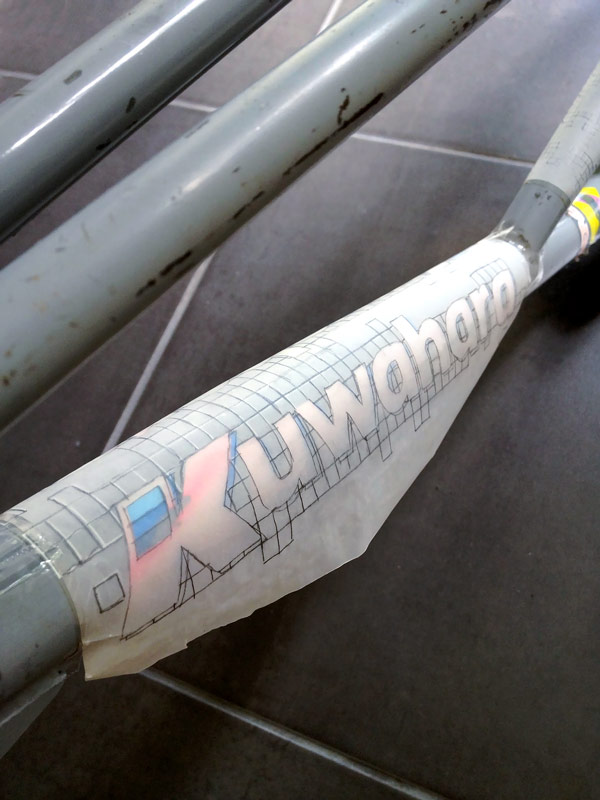
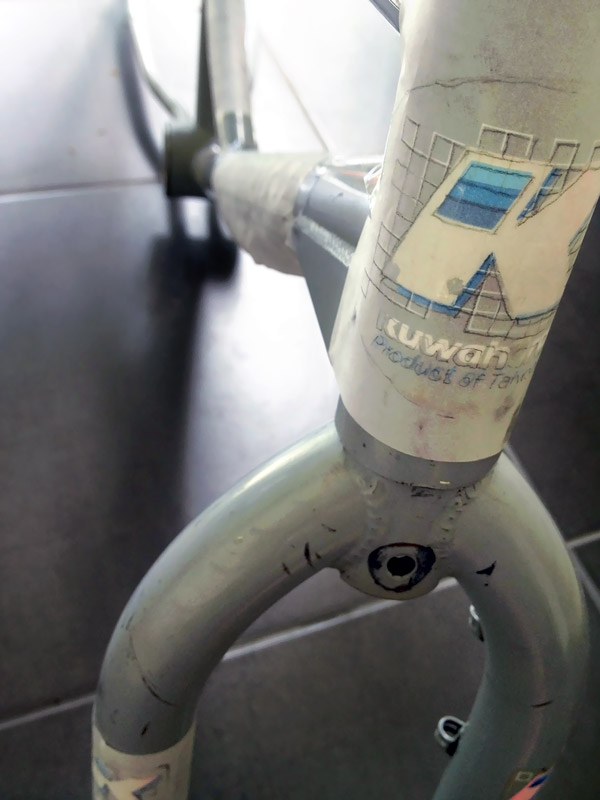
The best way to approach your survivor frame decals is one at a time. Choose the one you’d like to trace first and cut a piece of tracing paper that covers just that decal, with about a 1-2cm overlap on each edge. Wrap the paper around the tube, over the decal, and tack it in place with a few little pieces of tape.
Now it’s just up to you and the pencil. It’s important to relax and get into a comfortable position while you’re tracing. I usually sit cross legged on the couch with the frame supported on my lap. Don’t feel rushed, or feel like the lines have to be dead straight or perfect, you can go over a any line more than once to correct it, just like a sketch. Make sure you remember to mark the edges of each decal. As you finish each piece, remove the tracing paper and set it aside (write a note on it as to position, if you want), then go on with the next one.
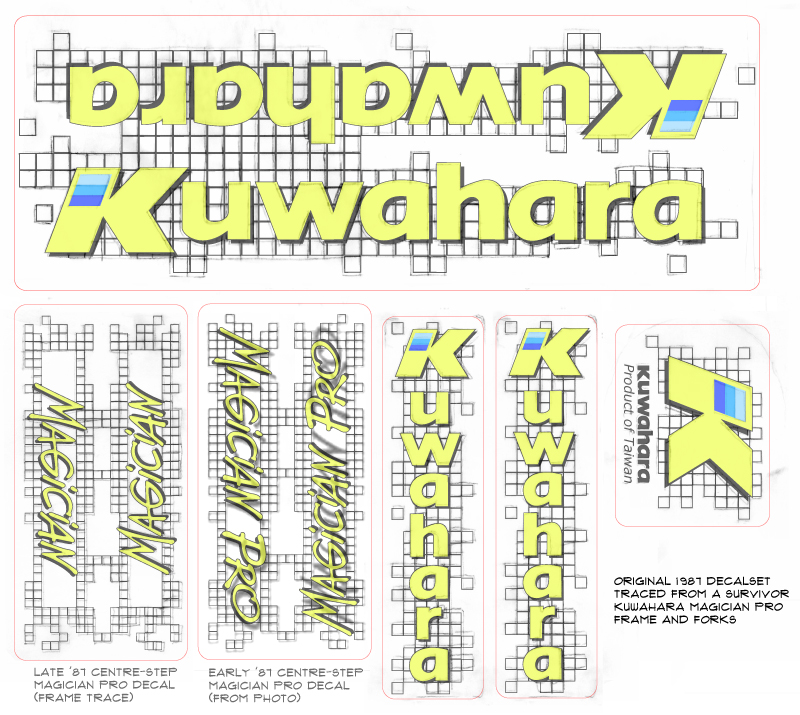
Here are a few photos from tracing my Kuwahara Magician Pro decals…

When you’ve finished tracing the next step is to scan your work. You’ll need to make sure that you scan resolution is set to 300dpi to ensure the best quality scan to work from. When you saved your scan, if you have photoshop (or similar) you can play with the contrast ratio to make the traced lines clearer and tweak the orientation of each scanned piece to make sure they all line up vertically and horizontally.
Here’s the tweaked scan from my Kuwahara Magician tracing…

At this point you’ve done yourself and your vintage bike a great service by archiving all the info you need to be able to reproduce that original decal set. If you have experience with Illustrator or Corel Draw you can now trace up vector artwork from your scan, or if not, find someone to do it for you. If you’re new to creating vector artwork but have the software and want to give it a go, here’s a few basic tips for drawing up decal artwork from a trace or scan…
– Use layers to help you separate different groups of colours and shapes so you can move and tweak them easily. First lock the layer containing your imported scan at the bottom of the document so you don’t end up selecting and moving it by mistake, and then create a new layer above it to start your trace.
– To trace each shape, set your fill colour to transparent and your stroke colour to something that will stand out from the scan. Don’t worry about adding fill or correct colours until the end when you have everything traced, at which point you can group all like colours together and uniformly adjust fill and stroke.
– Use guides to ensure that your lines are straight. And use the info panel to quickly and easily check the measurements of a shape when it’s selected.
– As a general rule of thumb, the fewer anchor points the smoother the result, so learn to manipulate curves really well and you’ll get better results (all it takes is a bit of practise).
…and the most important thing is to have fun with it!
Here’s a pic of the finished vector artwork with the transparency adjusted so you can see the original trace underneath…