Electrochemical Etching
For those who’ve seen my DIY electrochemically etched Prody 99 head tube badge and want to know more about the process (maybe even have a go), this page contains the info you’ll need to understand what’s involved.
There are two relatively ‘safe’ (non-acidic) electrochemical etching methods that have been developed by printmakers (artists) for etching — one for warm coloured metals, one for cool. For etching brass and copper you’ll need ferric chloride (Google it if you want to know more about that process). For etching cool (silvery coloured) metals like aluminium, zinc or steel, you’ll need to create a saline sulphate solution — the method I used, and the method that’s detailed in the guide below. (NB. Never mix the two solutions.)
Here’s a little photo diary of my process…
My original Agent 99 artwork, drawn in black micro-liner from a photo of Barbara Feldon’s original 99. To work with the etching process (much like any process developed for printmaking) the aim was to simplify the features as much as possible, while keeping it iconically recognisable…
I scanned the drawing, traced it up as a vector in Adobe Illustrator, added my Ninety Nine logo, and the Prody and Colony logos, to create the final badge design that would be etched. I then reversed the design, and inverted the colours (black for the high points that would end up polished silver, white for the recesses that would be black), and laser printed it onto an acetate sheet ready to transfer to the aluminium plate…
On a lightly sanded sheet of 1mm aluminium sprayed with a little Isopropyl alcohol, I placed the acetate image print side down and used a hot iron to melt the toner ink and transfer the design to the aluminium plate (the iron was set to the minimum steam setting — no hotter as it can buckle the acetate and distort the design)…
I stacked up a bunch of transfers to experiment with — at this stage it’s all about trial and error, testing out the process to get familiar with its techniques and eccentricities…
Initial tests in the saline sulphate solution proved that while the acetate transfer method might work well for the light etch required for printmaking, it lacked the integrity for the deeper etch I needed. You can see the high points (silver areas) are lightly pitted and uneven…
Problem solving: I experimented with acrylic paint as the resist medium. I used Tamiya model acrylic that sets hard — as opposed to artist’s acrylics, they have too much elasticity and weaker adherence to non-porous surfaces. I scribbled with acrylic and a brush on the little test piece of aluminium below, and when it was dry I dropped it in the salt etch for 30 mins. Stoked with the depth and edge integrity — streets ahead of using the acetate transfer alone…
Now the fiddly part… I used a brush with 3 bristles (yep, THREE! it had to be fine enough to handle the level of detail) to paint the acrylic resist medium on a freshly transferred plate. It took 2–3hrs and a steady hand to cover all the areas of transfer, taking great care to get all the fine details and render the edges smooth and straight…
Acrylic dried and ready to etch…
The colours that are produced in the saline sulphate etch are ridiculously rad. I found (after a few tests) that gently wiping the red waste off the plate with a plastic spoon every 5 mins or so helps the speed and crispness of the etch. To watch a little time lapse Instagram video I took of the plate in the etch (complete with the excitement of hydrogen bubbles!), click here: http://instagram.com/p/vx42XgQzEt/ …
30 mins in the salt etch, ready to clean the acrylic off with acetone and check the integrity of the details, edges and high points…
Mixing up the saline sulphate solution: copper sulphate (available from hardware stores as a root killer) dissolved in warm water with a good amount of table salt added. The solution turns a vivid blue when the copper sulphate is dissolved.

The sediments that form during the etching process — the beautiful by-product of the saline sulphate etch.

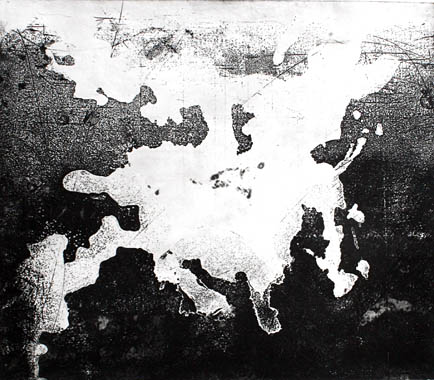
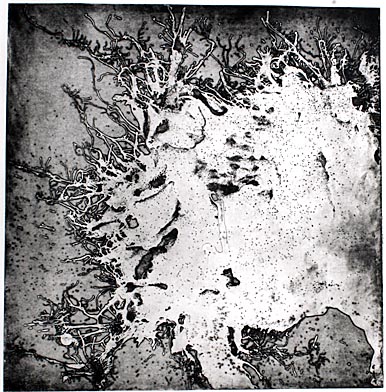
Some of my earlier steel etching work for reference — these Delineation pieces were etched in 2007:
The finished Prody 99 badge, fitted to the head tube: